How to Export Data from Facebook
Exporting your data from Facebook can help you keep a personal archive, or transfer information to another platform. Follow these steps to export your data:
Step-by-Step Guide
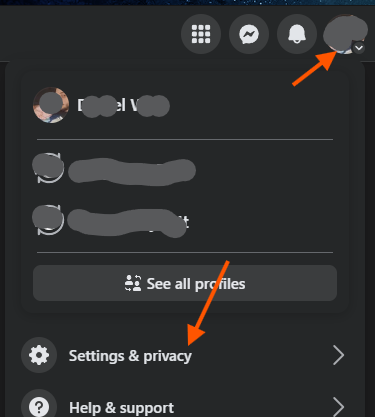
Step 1: Access Facebook Settings
- Log in to your Facebook account.
- Click on the downward arrow in the top-right corner of the page.
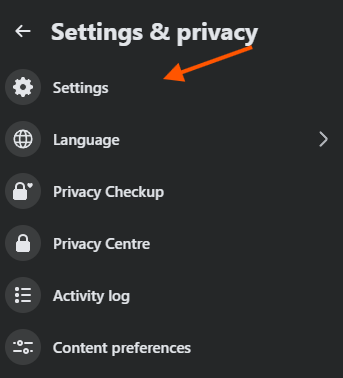
- Select Settings & Privacy* and then click *Settings.
Step 2: Navigate to Your Facebook Information
In the left sidebar, click on See More in Accounts Centre.
- You might be able to get here by clicking Facebook Accounts Centre
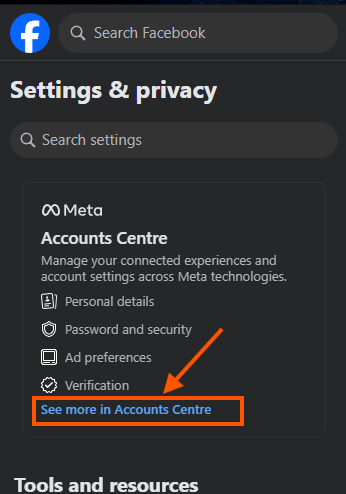
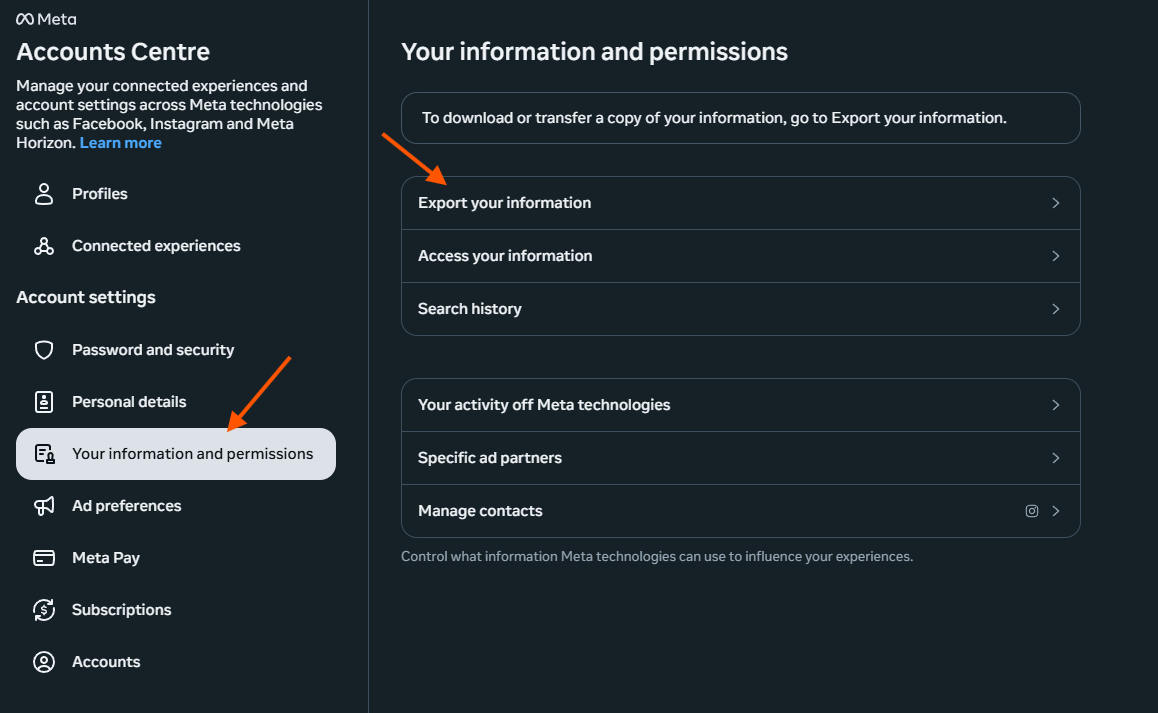
- Find and click on "Your information and permissions" and then click "Export your information".
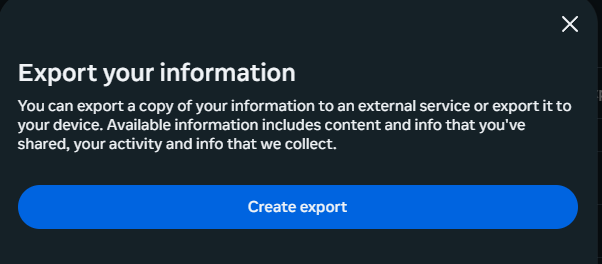
Step 3: Choose Data to Export
- Click Create Export.
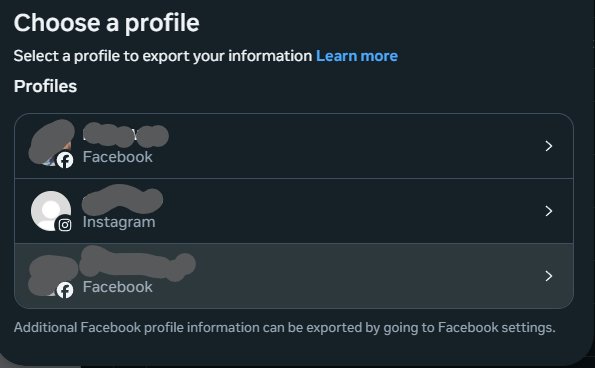
Choose a Profile
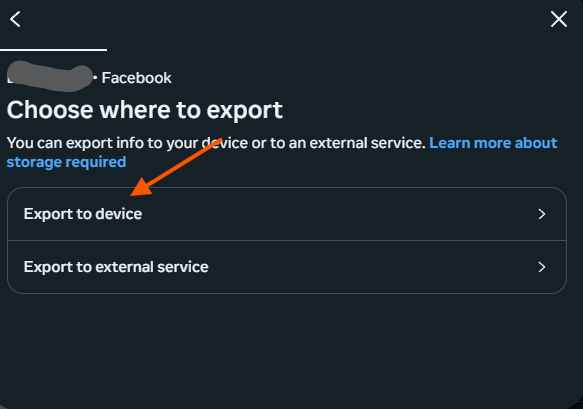
- Choose Export to Device
- Confirm what you want to export
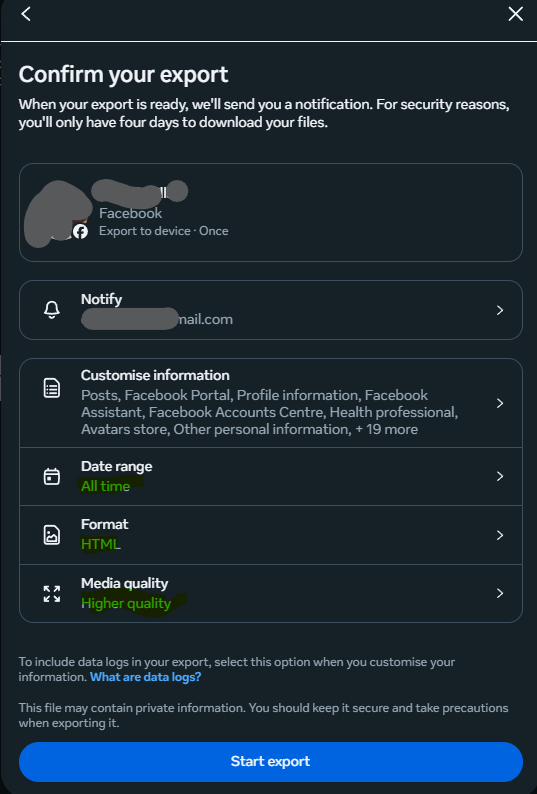
- If you are wanting to export your photos, you'll need to make sure "Posts" is ticked in the Customise information menu.
- Select the categories you wish to download by checking the boxes next to them.
Step 4: Select Date Range and Format
- Choose the date range for the data you want to download (probably "All Time").
- Select the format* (HTML or JSON) and the *media quality (High, Medium, Low - but preferably Higher).
Step 5: Create File
- Scroll down and click on Start Export.
- Facebook will start preparing your data. This may take some time depending on the size of your data.
Step 6: Download Your Data
- Once your file is ready, you'll receive a notification.
- Go back to the Download Your Information section.
- Click on Available Files* and then *Download next to your file.
- Enter your password when prompted to start the download.
Tips
- Ensure you have enough storage space on your device for the downloaded data.
- Keep your data secure and consider encrypting sensitive information.
By following these steps, you can successfully export your data from Facebook for your personal use or records.